AWS Image Builder by example with Terraform
21 September 2023
AWS Image Builder is a service that allows you to create AMIs using a recipe - a step-by-step pipeline that applies different "components" to the image and performs tests at the end. Pipelines that perform recipes can be scheduled to run on different dates and the resulting AMIs can be distributed to other accounts and regions. Today, we will create a sample image pipeline using Terraform and we will add two custom components - installation of Docker, and installation and configuration of Nginx. We will also add custom tags to the AMI using distribution configuration and schedule the pipeline to run every week at Saturday.
Main pipeline
Firstly, we need to define a main part of this whole service - the pipeline. To
the pipeline you can attach configurations and recipes. In file pipeline.tf we
define our pipeline.
resource "aws_imagebuilder_image_pipeline" "my-pipeline" {
  schedule {
    schedule_expression = "cron(0 0 ? * 7 *)" # Every Saturday at midnight
  }
  name                             = "my-pipeline"
  infrastructure_configuration_arn = "" // Will be added later
  image_recipe_arn                 = "" // Will be added later
  distribution_configuration_arn   = "" // Will be added later
}
Infrastructure configuration
Next important thing is infrastructure configuration. Depending of your needs,
you can select different instance sizes to be used for building and testing the
image. For this to work, you also need an IAM role with permissions. First, we
will focus just on that. The permissions we need are defined already by Amazon
in EC2InstanceProfileForImageBuilder and AmazonSSMManagedInstanceCore. In
iam.tf we write:
resource "aws_iam_role" "imagebuilder" {
  name = "ImageBuilderRole"
  assume_role_policy = jsonencode({
    Version = "2012-10-17"
    Statement = [
      {
        Action    = "sts:AssumeRole"
        Effect    = "Allow"
        Principal = { Service = "ec2.amazonaws.com" }
      }
    ]
  })
}

resource "aws_iam_instance_profile" "imagebuilder" {
  name = "ImageBuilderProfile"
  role = aws_iam_role.imagebuilder.name
}


resource "aws_iam_role_policy_attachment" "imagebuilder-ec2" {
  role       = aws_iam_role.imagebuilder.name
  policy_arn = "arn:aws:iam::aws:policy/EC2InstanceProfileForImageBuilder"
}

resource "aws_iam_role_policy_attachment" "imagebuilder-ssm" {
  role       = aws_iam_role.imagebuilder.name
  policy_arn = "arn:aws:iam::aws:policy/AmazonSSMManagedInstanceCore"
}
Next we will create infrastructure configuration. Here we specify what family of instances we want to use and what sizes. It looks very similar to EC2 instance or ASG template configuration. We also need to define security group, IAM role, optionally subnet.
data "aws_vpc" "default" { default = true }

resource "aws_security_group" "imagebuilder" {
  name   = "imagebuilder"
  vpc_id = data.aws_vpc.default.id
  egress {
    from_port        = 0
    to_port          = 0
    protocol         = "-1"
    cidr_blocks      = ["0.0.0.0/0"]
    ipv6_cidr_blocks = ["::/0"]
  }
}

resource "aws_imagebuilder_infrastructure_configuration" "infra-config" {
  instance_types                = ["t4g.small", "t4g.medium"]
  name                          = "my-pipeline-infra"
  security_group_ids            = [aws_security_group.imagebuilder.id]
  terminate_instance_on_failure = true
  instance_profile_name         = aws_iam_instance_profile.imagebuilder.name
}
Distribution configuration
We will now define distribution of the images. Let's copy them to another region on build and add some tags, so it's easier to search.
resource "aws_imagebuilder_distribution_configuration" "distribution" {
  name = "distribution-configuration"

  distribution {
    region = "eu-central-1"
    ami_distribution_configuration {
      ami_tags = {
        "Name" = "my-pipeline-ami"
      }
    }
  }

  distribution {
    region = "eu-west-1"
    ami_distribution_configuration {
      ami_tags = {
        "Name" = "my-pipeline-ami"
      }
    }
  }
}
Recipe
We move on to the recipe. The recipe requires at least one component but we will define it later. As a base image I choose Amazon Linux 2023. You can find the list of available images in [AWS
resource "aws_imagebuilder_image_recipe" "my-image-recipe" {
  // component { } // Will be added later
  name         = "my-image-recipe"
  parent_image = "arn:aws:imagebuilder:eu-central-1:aws:image/amazon-linux-2023-arm64/2023.x.x"
  version      = "1.0.0"
  description  = <<-EOF
  This is a recipe that takes latest Amazon Linux 2023 and installs latest Docker, Nginx and configures it.
  EOF
}
Docker component
Docker component is simpler. We just want to install Docker, validate if it was
installed and enabled (can we run hello-world) on the build instance and then
run again hello-world on a fresh, test instance made from the newly created
AMI. Components are written in YAML.
---
description: "This component installs latest Docker on Amazon Linux 2023"
schemaVersion: "1.0"
phases:
  - name: build
    steps:
      - name: InstallDocker
        action: ExecuteBash
        inputs:
          commands:
            - yum update -y
            - yum install docker -y
            - systemctl enable docker
            - systemctl start docker
  - name: validate
    steps:
      - name: ValidateDocker
        action: ExecuteBash
        inputs:
          commands:
            - sudo docker run hello-world
  - name: test
    steps:
      - name: TestDocker
        action: ExecuteBash
        inputs:
          commands:
            - sudo docker run hello-world
Nginx component
Nginx component is more complicated. We need to install Nginx and we will configure it based on parameters. First parameter is port to which forward the traffic (potentially a local Docker container) and whether the traffic should be a reverse proxy for HTTP or FastCGI (such as PHP). The validation and test phases should check if Nginx is listening on port 80 and replying with 502 (no gateway). Because this component is longer, I only give first lines of it here to show how it looks like. View full file in git repo.
description: >
  This component installs and configures latest Nginx on Amazon Linux 2023.
  The config forwards all traffic from port 80 to 127.0.0.1:8080
schemaVersion: "1.0"
parameters:
  - port:
      type: string
      description: "Port to forward to"
      default: "8080"
  - proxy_or_cgi:
      type: string
      description: "Whether to use proxy_pass or fastcgi_pass (proxy/cgi)"
      default: "proxy"
phases:
  - name: build
    steps:
      - name: InstallNginx
        action: ExecuteBash
        inputs:
          commands:
            - yum update -y
            - yum install nginx -y
            - systemctl enable nginx
            - systemctl start nginx
  # ...
Adding components
First let's create component resources in Terraform file components.tf:
resource "aws_imagebuilder_component" "docker-component" {
  name                  = "docker-component"
  platform              = "Linux"
  version               = "1.0.0"
  supported_os_versions = ["Amazon Linux 2023"]
  data                  = file("./components/docker.yaml")
}

resource "aws_imagebuilder_component" "nginx-component" {
  name                  = "nginx-component"
  platform              = "Linux"
  version               = "1.0.0"
  supported_os_versions = ["Amazon Linux 2023"]
  data                  = file("./components/nginx.yaml")
}
And now we can add them to the recipe:
resource "aws_imagebuilder_image_recipe" "my-image-recipe" {
  component { component_arn = aws_imagebuilder_component.docker-component.arn }
  component {
    component_arn = aws_imagebuilder_component.nginx-component.arn
    parameter {
      name  = "port"
      value = "9000"
    }
    # ... more parameters
  }
  name         = "my-image-recipe"
  parent_image = "arn:aws:imagebuilder:eu-central-1:aws:image/amazon-linux-2023-arm64/2023.x.x"
  # ...
}
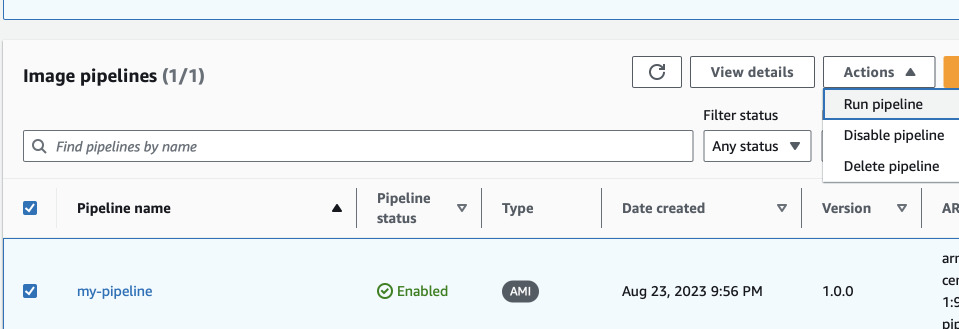
Running
To test the workflow, log in to your AWS Console, search for EC2 Image Builder and run the pipeline manually.
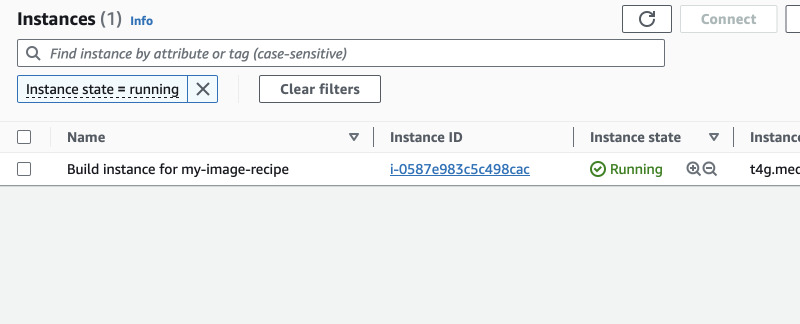
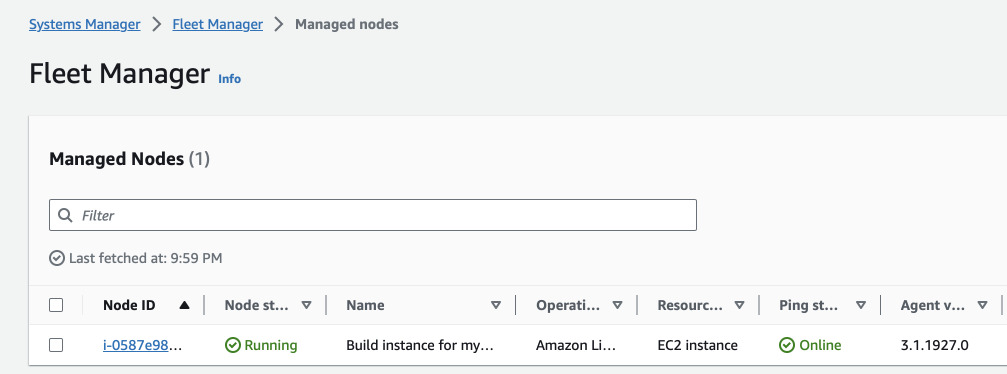
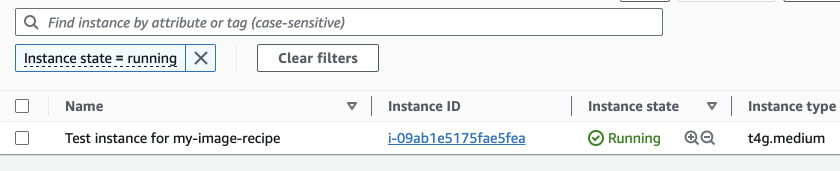
You should see EC2 instance being spawned after some seconds and after some more seconds it should show up in Systems Manager Fleet Manager.
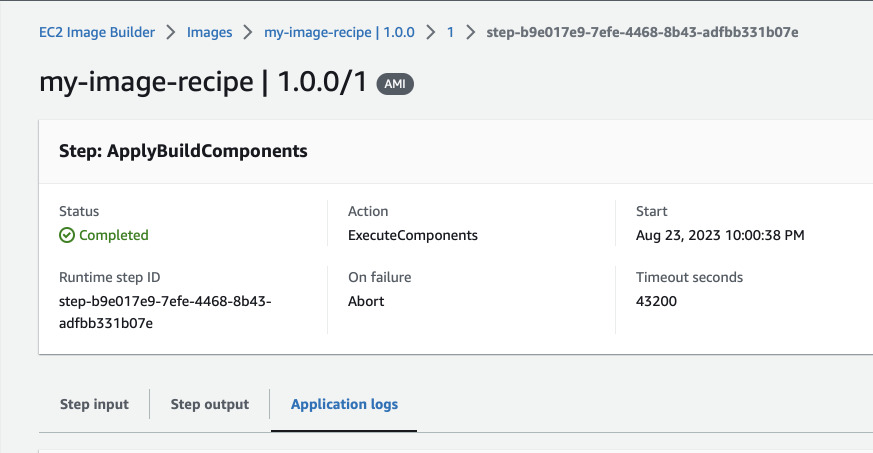
You can follow the status of the pipeline and build logs of each step.
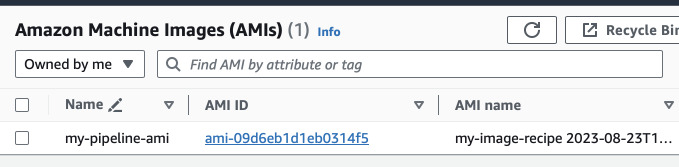
After the image was build in the current region, it will be tested on a new test instance. In the AMI list, the image is present but it is not tagged.
You can also follow the test logs of the instance.

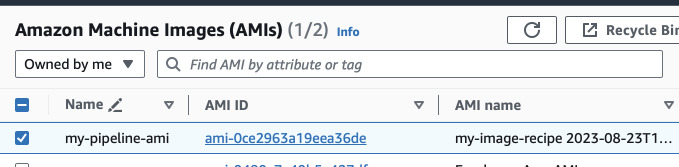
After the test is finished, the image is tagged and copied to the second region.
Switch the region and see if the image was also copied here (it finished after it is also tagged).
Using the image
We can start a new instance using this image. In Terraform you can search for it thanks to the tags that you added in the distribution configuration. Normally the actual AMI name (non-tag) needs to be unique and include the date. We can even search for one in another region by creating provider alias.
provider "aws" {
  alias  = "ie"
  region = "eu-west-1"
}

data "aws_ami" "my-imagebuilder-image" {
  tags        = { Name = "my-pipeline-ami" }
  most_recent = true
  provider    = aws.ie
}

resource "aws_instance" "test" {
  provider               = aws.ie
  instance_type          = "t4g.small"
  ami                    = data.aws_ami.my-imagebuilder-image.id
  # ...
}
Let's see what's inside this instance. We can see Docker installed and Nginx configured as we requested to.
$ aws ssm --region=eu-west-1 start-session --target i-0222223333334defa

Starting session with SessionId: iam-user-012abcdef123456
[root@localhost bin]# docker ps
CONTAINER ID   IMAGE     COMMAND   CREATED   STATUS    PORTS     NAMES
[root@localhost ~]# cat /etc/nginx/conf.d/default.conf
server {
    listen 80;
    location / {
      include fastcgi_params;
      fastcgi_pass 127.0.0.1:9000;
    }
  }
Seems the configuration happened. Let's test what we can use this for. We will run a simple PHP script in a Docker, modify Nginx to match the config and see if it works.
# Configure Nginx
$ echo 'fastcgi_param SCRIPT_FILENAME $document_root$fastcgi_script_name;' >> /etc/nginx/fastcgi_params
$ sed -i 's/^ *listen *80;/listen 81;/g' /etc/nginx/nginx.conf
$ cat > /etc/nginx/conf.d/default.conf <<EOF
server {
    listen 80;
    root /var/www/html;
    location ~ \.php$ {
      include fastcgi_params;
      fastcgi_pass 127.0.0.1:9000;
    }
  }
EOF
# A sample script
$ echo "<?php php_info(); ?>" >> info.php && chmod 0755 info.php
# Run a Docker container with PHP
$ docker run --rm\
 --name php -p 9000:9000\
 -v $(pwd)/info.php:/var/www/html/info.php\
 -d php:8-fpm-alpine
