How to tag S3 objects that were uploaded with presigned URL
1 July 2023
When we generate presigned URL for S3 uploads there's not much we can set in
advance. We can set the key, some metadata like Content-Type and
Content-Disposition. What if we wanted to specify some metadata that cannot be
set in advance? In this example the user will first create a temporary record
with Title tag and the object key and then upload the object to that key using
presigned POST URL.
The architecture below is actually more complex than the actual part of the problem as it includes a way to view uploaded images and HTML form to upload them.

The idea behind this is that when the user wants to upload a new photo and add a specific title, they will first send a POST request with the title to API Gateway/Lambda that will return an HTML form with presigned form fields. A random key will be generated for the future bucket object and the title with key will be stored in Redis ElastiCache for the expiration time of the presigned URL (5 minutes in this example). This data can be then asynchronously used for analysis such as validity, translation, etc.
After the user uploads the object within 5 minutes, S3 will run another Lambda
via notification s3:ObjectCreated:Put that will read the title from Redis and
set the tags. In real world scenario this event might happen before we finished
processing the previous form, so there should be more logic to handle that. But
this example is simplified and will assume that title is always processed before
the user uploads the object.
The repository is available at: https://github.com/ppabis/s3-presigned-tagging/
Creating the bucket
Let's set up a new Terraform project with standard AWS provider settings. For
naming I will use random string to find a unique name for the bucket, so I will
also import hashicorp/random provider. In bucket.tf create the following
resources.
resource "random_string" "bucket-name" {
    length = 8
    lower = true
    upper = false
    numeric = false
    special = false
}

resource "aws_s3_bucket" "bucket" {
  bucket = "photos-${random_string.bucket-name.result}"
  force_destroy = true     # Needed if you want easy terraform destroy
}
For this project we want to view the objects easily on a website, so we will set the bucket to public with proper permissions and enable S3 website hosting. This step is optional depending on the use case.
resource "aws_s3_bucket_public_access_block" "bucket-public" {
  bucket = aws_s3_bucket.bucket.id
  block_public_policy = false
}

resource "aws_s3_bucket_website_configuration" "bucket-website" {
  bucket = aws_s3_bucket.bucket.id
  index_document {
    suffix = "index.html"
  }
}

data "aws_iam_policy_document" "bucket-policy" {
  depends_on = [ aws_s3_bucket_public_access_block.bucket-public ]
  statement {
    actions = [ "s3:GetObject" ]
    resources = [ "${aws_s3_bucket.bucket.arn}/*" ]
    principals {
      type = "*"
      identifiers = [ "*" ]
    }
  }
}

resource "aws_s3_bucket_cors_configuration" "allow-all-origins" {
  bucket = aws_s3_bucket.bucket.id
  cors_rule {
    allowed_headers = ["*"]
    allowed_methods = ["GET"]
    allowed_origins = ["*"]
    max_age_seconds = 600
  }
}

resource "aws_s3_bucket_policy" "bucket-policy" {
  bucket = aws_s3_bucket.bucket.id
  policy = data.aws_iam_policy_document.bucket-policy.json
}
Code up to this point is tagged: bucket.
Creating the Lambdas for viewing and uploading
Next up we need to create the Lambdas that will handle the viewing and uploading
of the images. The viewing part is optional, but it's nice to have a way to
verify that our solution is working. For uploading Lambda from Terraform we need
another provider: hashicorp/archive. This provider will let us create .zip
files.
Let's start by creating policy for bucket listing and a role for Lambda
function. In a new file iam-policies.tf create the following policy.
resource "aws_iam_policy" "list-bucket" {
  name        = "ListPhotosBucket"
  description = "Allows to read object metadata and list objects in the photos bucket"
  policy = jsonencode({
    Version = "2012-10-17"
    Statement = [
      {
        Sid    = "ListBucket"
        Effect = "Allow"
        Action = [ "s3:ListBucket" ]
        Resource = [ "${aws_s3_bucket.bucket.arn}" ]
      },
      {
        Sid    = "GetObject"
        Effect = "Allow"
        Action = [
          "s3:GetObject",
          "s3:GetObjectTagging",
          "s3:GetObjectAttributes"
        ]
        Resource = [ "${aws_s3_bucket.bucket.arn}/*" ]
      }
    ]
  })
}
Next we will create a role that can be assumed by Lambda service and attach the policy we defined previously. We will also attach standard AWS managed policy that will create Lambda logs for us in CloudWatch.
resource "aws_iam_role" "lambda-show-bucket" {
  name = "lambda-show-bucket"
  assume_role_policy = jsonencode({
    Version = "2012-10-17"
    Statement = [ {
        Sid = ""
        Effect = "Allow"
        Principal = { Service = "lambda.amazonaws.com" }
        Action = "sts:AssumeRole"
      } ]
  })
}

resource "aws_iam_role_policy_attachment" "lambda-show-bucket" {
  role = aws_iam_role.lambda-show-bucket.name
  policy_arn = aws_iam_policy.list-bucket.arn
}

data "aws_iam_policy" "lambda-logs" {
  name = "AWSLambdaBasicExecutionRole"
}

resource "aws_iam_role_policy_attachment" "lambda-basic-execution" {
  role = aws_iam_role.lambda-show-bucket.name
  policy_arn = data.aws_iam_policy.lambda-logs.arn
}
Now we can create the Lambda functions themselves. We will use Python 3.8
runtime. For now the code will be just a mock, we will fill it in later. So lets
define two functions: list.py and create.py, both with the same content.
def lambda_handler(event, context):
    print("Hello from lambda")
    return {
        'statusCode': 200,
        'headers': {
            'Content-Type': 'text/html'
        },
        'body': 'Hello from Lambda!'
    }
We will upload them via Terraform. We will define a data source archive_file
that will create a .zip file. Next we will create a Lambda function with
needed settings and use the .zip file as source. Do the same for both
functions.
data "archive_file" "lambda-list" {
  type = "zip"
  source {
    content  = file("list.py")
    filename = "list.py"
  }
  output_path = "list.zip"
}

resource "aws_lambda_function" "list" {
  filename      = data.archive_file.lambda-list.output_path
  handler       = "list.lambda_handler"
  role          = aws_iam_role.lambda-show-bucket.arn
  runtime       = "python3.8"
  function_name = "list-photos-bucket"
  source_code_hash = data.archive_file.lambda-list.output_base64sha256
  environment {
    variables = {
      BUCKET_NAME = aws_s3_bucket.bucket.id
    }
  }
}
API Gateway
Next we will spin up API Gateway that will be used for interacting with the
Lambdas. In it we will create two methods: GET and POST directly in the
root resource. There will be no authorization to make the API public. The output
will be invoke_url of a deployment (in this case prod stage).
resource "aws_api_gateway_rest_api" "api" {
  name = "api-${random_string.bucket-name.result}"
}

resource "aws_api_gateway_method" "post" {
  rest_api_id   = aws_api_gateway_rest_api.api.id
  resource_id   = aws_api_gateway_rest_api.api.root_resource_id
  http_method   = "POST"
  authorization = "NONE"
}

resource "aws_api_gateway_method" "get" {
  rest_api_id   = aws_api_gateway_rest_api.api.id
  resource_id   = aws_api_gateway_rest_api.api.root_resource_id
  http_method   = "GET"
  authorization = "NONE"
}

resource "aws_api_gateway_integration" "post-create" {
  rest_api_id = aws_api_gateway_rest_api.api.id
  resource_id   = aws_api_gateway_rest_api.api.root_resource_id
  http_method = aws_api_gateway_method.post.http_method

  integration_http_method = "POST"
  type                    = "AWS_PROXY"
  uri                     = aws_lambda_function.create.invoke_arn
}

resource "aws_api_gateway_integration" "get-list" {
  rest_api_id = aws_api_gateway_rest_api.api.id
  resource_id   = aws_api_gateway_rest_api.api.root_resource_id
  http_method = aws_api_gateway_method.get.http_method

  integration_http_method = "POST"
  type                    = "AWS_PROXY"
  uri                     = aws_lambda_function.list.invoke_arn
}

resource "aws_api_gateway_deployment" "prod" {
  rest_api_id = aws_api_gateway_rest_api.api.id
  stage_name  = "prod"

  depends_on = [
    aws_api_gateway_integration.post-create,
    aws_api_gateway_integration.get-list
  ]

  variables = {
    "deployed_version" = "1" # Change this to force deployment, otherwise you have to do it manually
  }
}

output "api-gateway" {
  value = "${aws_api_gateway_deployment.prod.invoke_url}"
}
Next we need to also add resource permissions to our Lambda function that will
allow API Gateway to invoke it. For list function we need to allow GET
request and for create function we need to allow POST request.
resource "aws_lambda_permission" "api-list" {
  function_name = aws_lambda_function.list.function_name
  source_arn = "${aws_api_gateway_rest_api.api.execution_arn}/*/GET/*"
  principal = "apigateway.amazonaws.com"
  action = "lambda:InvokeFunction"
}

resource "aws_lambda_permission" "api-create" {
  function_name = aws_lambda_function.create.function_name
  source_arn = "${aws_api_gateway_rest_api.api.execution_arn}/*/POST/*"
  principal = "apigateway.amazonaws.com"
  action = "lambda:InvokeFunction"
}
And now we can finally test our API if everything is reachable.
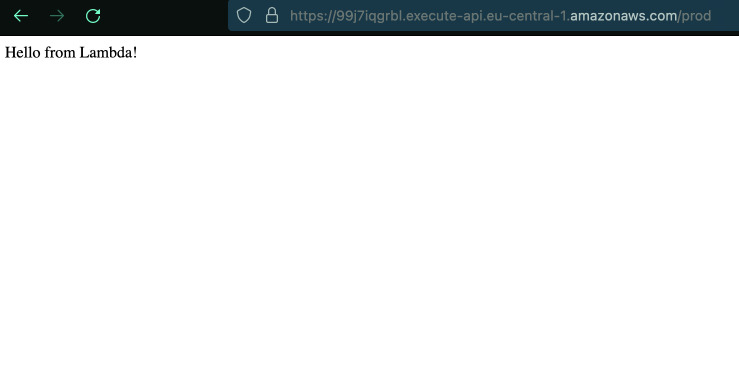
Code up to this point is tagged: mock-gateway-and-lambdas.
Listing the bucket
Next we need to write the code for our Lambda functions. First we will start
with list function. We will use boto3 library to list the S3 bucket. The
bucket name will be taken from environment variables we set earlier.
import boto3, os
s3 = boto3.client('s3')
bucket_name = os.environ['BUCKET_NAME']

HTML_TEMPLATE = """
<html> <body> <ul> {list_items} </ul> </body>
"""

def get_list_items():
    response = s3.list_objects_v2(Bucket=bucket_name)
    items = response['Contents']
    list_items = ""
    for item in items:
        list_items += f"<li><a href=\"http://{bucket_name}.s3.amazonaws.com/{item['Key']}\">{item['Key']}</a></li>"
    return list_items

def lambda_handler(event, context):
    return {
        'headers': { 'Content-Type': 'text/html' },
        'statusCode': 200,
        'body': HTML_TEMPLATE.format(list_items=get_list_items())
    }
Let's upload some files to the bucket and see if we can list them.
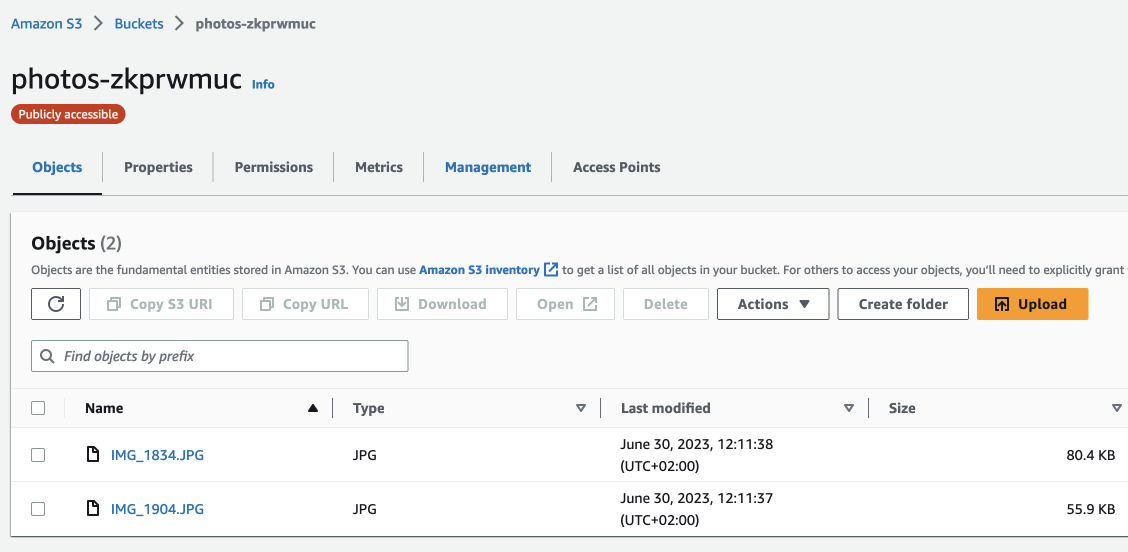
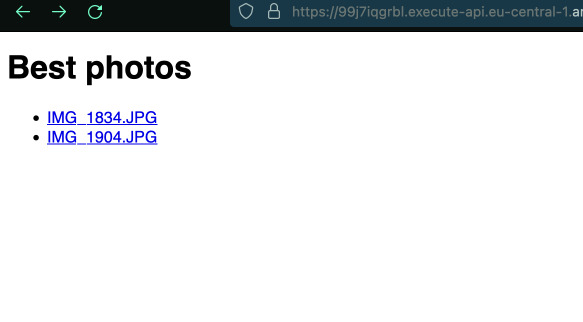
Code up to this point is tagged: lambda-list-items
We can clearly see the files and because the bucket is public we can also follow
the links. Next let's change the function a bit so that it loads the Title tag
into the list instead of the key name.
def get_object_title_tag(key):
    # Will return either the tag "Title" or the key name if no tag is found
    response = s3.get_object_tagging(Bucket=bucket_name, Key=key)
    tags = response['TagSet']
    for tag in tags:
        if tag['Key'] == 'Title':
            return tag['Value']
    return key
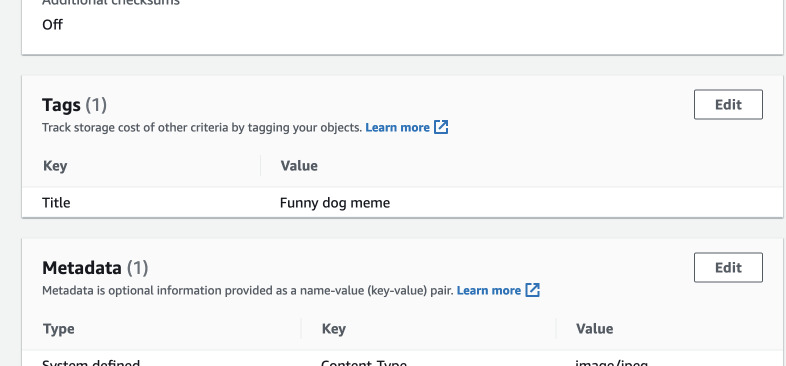
After manually adding a Title tag to an object, we can see the title in the
list. And this object's URL still leads to the actual key.

We can change the <a> elements to become <img> so we can see the images
directly in the browser. Also we will add a header in each list item that will
represent the title of the uploaded image.
The completed file with some styling is available here.
File uploads
Now we need to create a policy for the second Lambda function. We need to
include permissions to generate presigned POST URLs and s3:PutObject because
the end user will inherit this permission. We will also attach the logging
policy to the create function so we can debug just in case.
resource "aws_iam_policy" "generate-post" {
  name        = "GenerateUploadPost"
  description = "Allows to generate post presigned links for the photos bucket"
  policy = jsonencode({
    Version = "2012-10-17"
    Statement = [ {
        Sid    = "GeneratePost"
        Effect = "Allow"
        Action = [
          "s3:GeneratePresignedPost",
          "s3:PutObject"
        ]
        Resource = [
          "${aws_s3_bucket.bucket.arn}",
          "${aws_s3_bucket.bucket.arn}/*"
        ]
      } ]
  })
}

resource "aws_iam_role" "lambda-post-bucket" {
  name = "lambda-post-bucket"
  assume_role_policy = jsonencode({
    Version = "2012-10-17"
    Statement = [ {
        Sid = ""
        Effect = "Allow"
        Principal = { Service = "lambda.amazonaws.com" }
        Action = "sts:AssumeRole"
      } ]
  })
}

resource "aws_iam_role_policy_attachment" "lambda-post-bucket" {
  role = aws_iam_role.lambda-post-bucket.name
  policy_arn = aws_iam_policy.generate-post.arn
}

resource "aws_iam_role_policy_attachment" "lambda-create-basic-execution" {
  role = aws_iam_role.lambda-post-bucket.name
  policy_arn = data.aws_iam_policy.lambda-logs.arn
}

resource "aws_lambda_function" "create" {
    ...
    role = aws_iam_role.lambda-post-bucket.arn
    ...
}
In the create function we will also redirect the user after successful upload
back to the API endpoint. However, defining the output of API Gateway resource
directly in Lambda's environment variables is not possible because of dependency
cycle. So just hardcode the output value for now.
 ...
 environment {
    variables = {
      BUCKET_NAME = aws_s3_bucket.bucket.id
      REDIRECT = "https://abcdefghi.execute-api.eu-central-1.amazonaws.com/prod"
    }
 }
 ...
The code for the create function is long so you can
find it here.
It will read the title sent from another form (we will define later) and output
a form for uploading with presigned fields taken from S3. As additional fields
we will add redirect that also needs to be signed by S3.
Now we need another form because our create function is executed using POST
method. We will include the new form at the top of the list page. Empty action
will submit the form to the same URL we are already in.
<h2>Upload photo</h2>
<form action="" method="post">
    <label for="title">Title:</label>
    <input type="text" name="title">
    <input type="submit" value="Next">
</form>

Everything seems to be fine. The photos do upload.
Current state of the code is tagged: create-upload-form.
But there's still no title. We need to add a tag to the uploaded object. But the problem is that the user doesn't have permissions to do that with presigned form. My idea to solve this is to use another Lambda function that will be called by S3 upload notification and the title will be shared inside ElastiCache. Many other services can be used for that too such as SQS or DynamoDB. But in this project we will use Redis.
The file for spinning up a Redis cluster is
available here.
As ElastiCache needs to reside within a VPC and a subnet, in this example
default VPC is used and a new subnet is created. Thus our create Lambda
function will also need to reside inside a VPC and the same subnet. We will
define a new security group for the Lambda function and attach some
configuration. What is more we need the Lambda to have VPC execution role to
create a network interface, etc.
resource "aws_lambda_function" "create" {
    ...
  vpc_config {
    subnet_ids = [aws_subnet.lambda-elasticache.id]
    security_group_ids = [aws_security_group.lambda.id]
  }
}

resource "aws_security_group" "lambda" {
  name        = "LambdaSecurityGroup-${random_string.bucket-name.result}"
  description = "Security group for lambdas for photos bucket"
  egress {
    from_port        = 0
    to_port          = 0
    protocol         = "-1"
    cidr_blocks      = ["0.0.0.0/0"]
    ipv6_cidr_blocks = ["::/0"]
  }
}

data "aws_iam_policy" "lambda-post-vpc-execution" {
  name = "AWSLambdaVPCAccessExecutionRole"
}

resource "aws_iam_role_policy_attachment" "lambda-vpc-execution" {
  role = aws_iam_role.lambda-post-bucket.name
  policy_arn = data.aws_iam_policy.lambda-post-vpc-execution.arn
}
It is also possible that our Lambda function might not reach S3 because the subnet might not have Internet Gateway attached or a public IP. To be sure, we will create a VPC endpoint in the VPC and add it to this subnet.
resource "aws_route_table" "elasticache-lambda" {
    vpc_id = data.aws_vpc.default.id
}

resource "aws_vpc_endpoint" "s3" {
    vpc_id = data.aws_vpc.default.id
    service_name = "com.amazonaws.eu-central-1.s3"
    vpc_endpoint_type = "Gateway"
    route_table_ids = [aws_route_table.elasticache-lambda.id]
}

resource "aws_route_table_association" "elasticache-lambda" {
    subnet_id = aws_subnet.lambda-elasticache.id
    route_table_id = aws_route_table.elasticache-lambda.id
}
Finally, we are ready to modify the create.py function to save the title in
Redis. We will install the Redis library with pip and upload it also to the
Lambda function. We need to change the archive resource to include the entire
directory. And also we require the Redis endpoint to be passed as an environment
variable.
data "archive_file" "lambda-create" {
  type = "zip"
  source_dir = "lambda/create/"
  output_path = "create.zip"
}

resource "aws_lambda_function" "create" {
  ...
  environment {
    variables = {
      REDIS_HOST = aws_elasticache_cluster.elasticache.cache_nodes.0.address
    ...
In create.py we will connect to Redis and save the title under the key of the
bucket object. To be sure that the title is saved, we will also read it back
and print it to the logs.
from redis import Redis
REDIS_HOST = os.environ['REDIS_HOST']
redis = Redis(host=REDIS_HOST, port=6379)


def put_in_redis(key, title):
    redis.set(key, title)
    redis.expire(key, 600)
    test = redis.get(key).decode('utf-8')
    print(f"Redis test: {test}")

def create_upload_form(event):
    ...
    print(f"Title: {title}, UUID: {uid}")
    put_in_redis(uid, title) # Before generating the URL
Now after trying to upload a new image, we will see on the graph in ElastiCache that there's a record inside.

Milestone at this point is tagged: redis-store.
Tagging the object
The last part is to tag the object. We will create another Lambda function that
will be called by S3 upload notification. The update.py Lambda function will
also need VPC execution role and also s3:PutObjectTagging permission. It will
be placed in the same subnet and the same security group as the create.py.
What will be distinct is that this Lambda requires resource permission to be
called by S3.
resource "aws_lambda_permission" "s3-notification" {
  statement_id  = "AllowExecutionFromS3Bucket"
  action        = "lambda:InvokeFunction"
  function_name = aws_lambda_function.update.function_name
  principal     = "s3.amazonaws.com"
  source_arn    = aws_s3_bucket.bucket.arn
}
Then the notification is defined simply like this:
resource "aws_s3_bucket_notification" "photos-uploaded" {
    bucket = aws_s3_bucket.bucket.id
    lambda_function {
        lambda_function_arn = aws_lambda_function.update.arn
        events = ["s3:ObjectCreated:*"]
    }
}
The whole function is very simple but takes some lines. It is available
under this link.
And just as create.py function, this one will need the Redis host as an
environment variable and be packed with the Python Redis package.
data "archive_file" "lambda-update" {
  type = "zip"
  source_dir = "lambda/update/"
  output_path = "update.zip"
}

resource "aws_lambda_function" "update" {
  ...
  environment {
    variables = {
      REDIS_HOST = aws_elasticache_cluster.elasticache.cache_nodes.0.address
    }
  }
}
Now the whole project is complete. We can test by uploading a new file with new title and seeing how the title changes asynchronously.
The same method can be used for detecting content type of the file and setting the metadata. Alternatively we can use Javascript to detect the content type of selected file and getting the presigned URL with XHR request but this way the content type can be changed by the user, so it's a less secure method.